
|
We've
had
an
offer
in on a home for a couple months (short sale - you don't want
to do one of these!) and in the time we've
been waiting for word on whether we've gotten it, I've been trying to
assemble the tools to get a garden going at the possible new place. I
had been
considering a plow and a disk harrow or maybe a #33 tiller for my
little garden tractor. I will admit to be a rank newbie at
tilling land with anything more than a pick, shovel, hoe and a rented
power tiller, so I had
some basics to learn before I could make any decisions on what to
purchase.
One
of
the
things
I learned was that even if I did manage to find a tiller,
I would do better by putting a plow to the ground first to break the
soil. After the soil was turned over for the first time, the tiller
would have an easier job of breaking the soil into a consistency
suitable for planting my crops. Seeing as it is getting late in the
summer already (July), I would probably only get a chance to turn the
soil over and let the vegetation decompose over the winter. Come
spring, I could plow and disk or use the tiller to get ready to plant.
Since
the
#33
tiller
comes with a way to attach it to the tractor and a plow
doesn't, I needed to make a choice on how I would attach the plow.
There are two basic choices: a 3-point hitch or an Integral (sleeve)
hitch.
The 3-point adapts to a wider array of implements and is more
expensive. The sleeve hitch is about half the cost but doesn't adapt to
as many tools.
I
started watching Ebay for both types. I saw a heck of a lot more of the
sleeve hitches for sale. On occasion a 3-point would come up for sale,
but prices for one that fit the 317 often went for more than $500.
Sleeve hitches started at around $150 and sometimes topped $250. For
plows, the ones that attached to a sleeve hitch were more common. You
could also purchase a new Brinly plow from Sears for under $350 and
used on Ebay
they usually started at $100 plus shipping.
I
found a kind of rusty sleeve hitch for a decent price and moderate
shipping and as soon as I heard that it had been shipped, I found a
slightly rusty plow that had been barely used. The owner had it listed
as both an auction and a buy it now - but for local pickup only. He was
about 700 miles from me, so that wouldn't work easily. However, on a
chance, I wrote him and suggested that I'd pay the full 'buy it now'
price and
pay whatever the shipping was if he'd strip it down and pack it up for
me. He agreed and within a few days I had both the sleeve hitch and
plow. I got no crazy deals, but think I paid a fair price for both
items.
All
I
needed
now
was to clean them up and give them a coat of paint to
prevent more rusting. Oh, and I also needed to buy or make the hitch
lift rod that allows the tractor's hydraulics to raise and lower the
sleeve hitch. With the sleeve hitches being a fairly common Ebay item,
you'd think that the rod used to lift and lower the hitch would be as
well. Not so much.
However
all
is
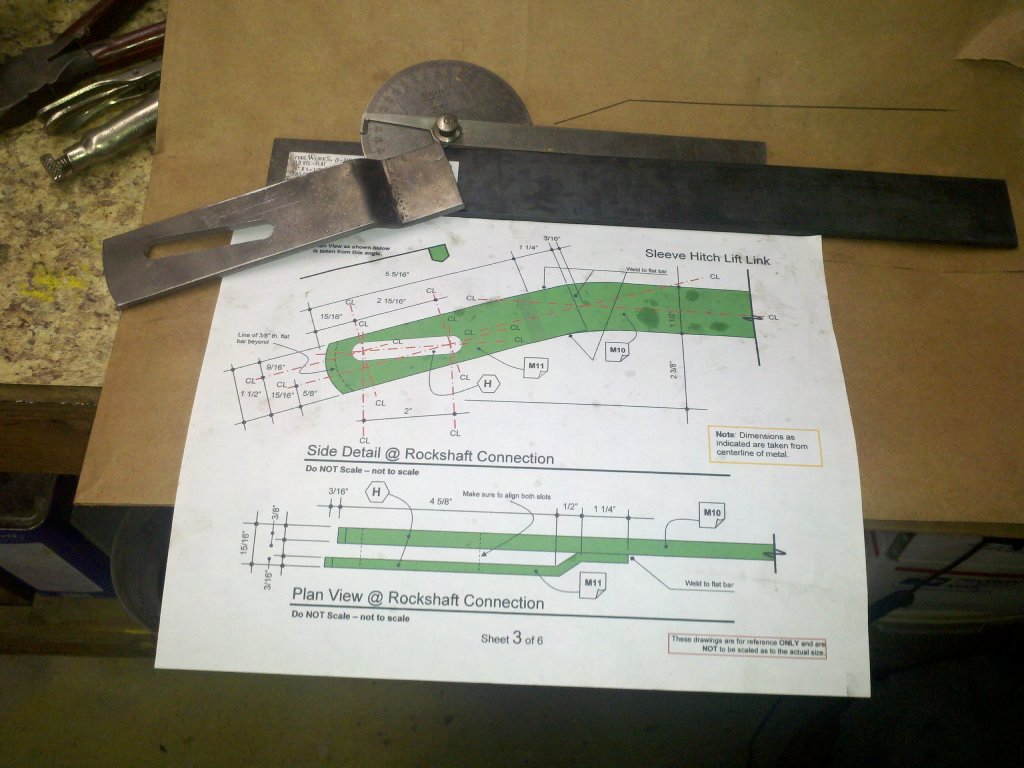
not lost. Some nice guys measured and drew up some CAD drawings
for
both the sleeve hitch and the lift rod. They're posted over at
www.wfmfiles.com. I had actually
considered building the sleeve hitch,
but when I priced the raw steel, I decided that it was more cost
effective to buy a used one. Unfortunately, this scenario is becoming
more and more common. The price of raw metal in small quantities is
exorbitantly high. Conversely, and not really applicable to this
instance, the prices on manufactured imported items are ridiculously
cheap in comparison to raw materials. Sometimes the quality of the
metal is enough to warrant the difference in price, but in my
experience, usually not.
Anyway,
there
were
no
lift rods available on Ebay or elsewhere at the time I
wanted one, so I bought the raw steel and made one. It was a fairly
simple project if you are fortunate enough to have an Oxy/Acetylene
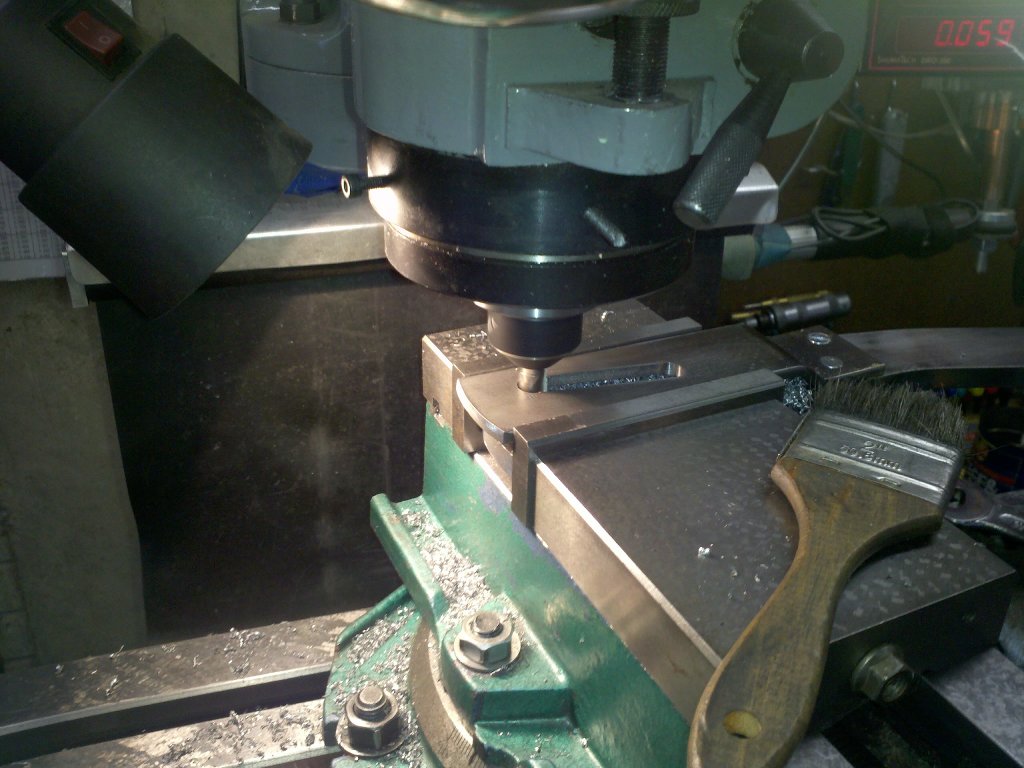
setup with a rosebud head to assist with bending the steel. A milling
machine for cutting the slots isn't a must, but it turns what could be
a 4 hour drill and file job into less than an hour of setup and
slotting on the mill.
This
would
have
been
a good job for an arc or mig welder. Unfortunately, all
I presently have is a gas outfit, so it would have to do. Because of
this I decided to pre-attach the slotted piece to the bar by drilling
and tapping for screws. I figured that this would not only prevent the
two pieces from moving while brazing them, but would also result in a
little more strength in the joint. It turned out that it worked as
planned and after silver brazing the joint, I'm confident that this
joint will take any abuse I can give it.
For the adjustment of
the pivot on the hitch end of the rod, I followed the plans, but wasn't
really too happy with the results. It worked OK, but the inside of the
U bend is an
inch wide and the tab it attaches to is only 3/8" wide. I'm pretty sure
this was a design decision to allow a nut to fit between the arms of
the pivot piece, but there's a lot
of slop there. Don't get me wrong, it would work fine, but it just
didn't
look right to my somewhat critical eyes. After building and attaching
the lift rod as it was designed, I ended up using some 1-1/4" bar stock
and
machining a pivot with .410" slot. A .410 slot on a .375" tab
made for a
better fit and gives the rod a better look. (In my humble opinion.) If
I were to do it over again, I would substitute a 1/2"-13 tpi threaded
rod for the 7/16" rod called for in the plans. I don't think it is
needed for strength, it just would look a little beefier. The nice
thing
about using the bar stock with longer tapped threads is that it will
work for both the
tiller and for the sleeve hitch. With my clevis (pivot), there is about
3" of adjustment available. Since I used a 14 tpi thread, each
1/2 turn of the clevis adjusts the rod length by about .036".
That
should be plenty fine enough adjustment for both tiller and
hitch.
Assembling the plow
was interesting. I've never worked with a plow before. I had read the
Brinly plow manual and a couple other documents on how one goes about
setting up a plow to produce good furrows, but it wasn't until I had
the plow assembled on the floor that all I had read made sense. Pretty
neat
technology. Reading the manual also saved me from some grief
later as I had read about how to adjust the swing of the coulter.
When I began to clean up the coulter, I found that the pivot with arms
that
support the coulter disk and swivel on the shaft was rusted solid and
the coulter
wouldn't swivel. It only took a short while to drift the pin out of the
shaft and remove the arm assembly, then clean and lubricate the shaft,
but I would have missed that had I not read the manual first. The drift
pin limits the amount of swivel to about 15°.
All in all, a fun
couple of projects and I'm really looking forward to putting the plow
into the earth. Hope we get that new place.
If you've read this
far, I'm sure that you'd appreciate some pictures, so here you go:
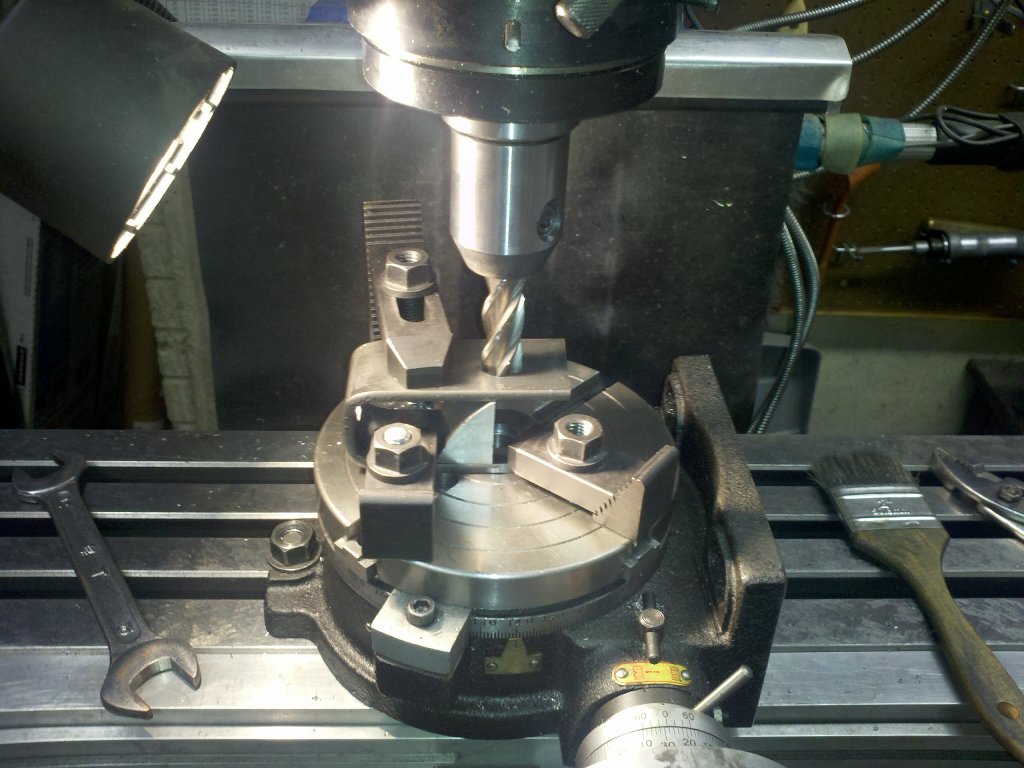 |
| Milling the 5/8" hole
on the pivot (clevis) |
 |
| Milling the radiused ends of the
clevis. |
 |
| Checking the angle for the bend |
 |
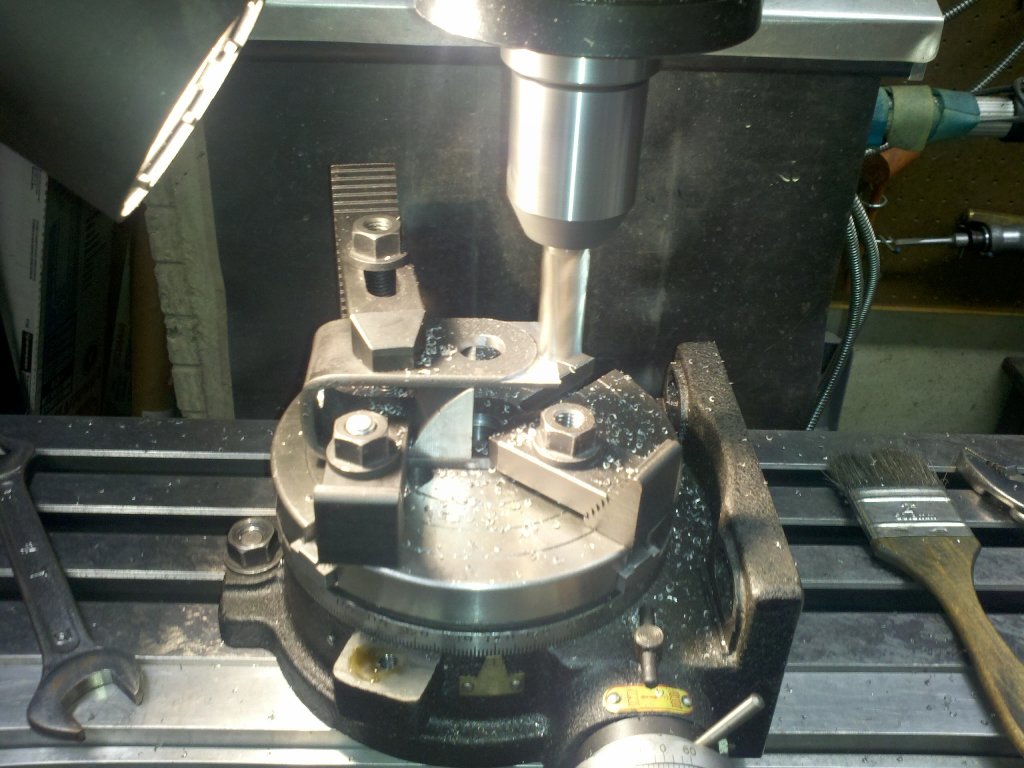
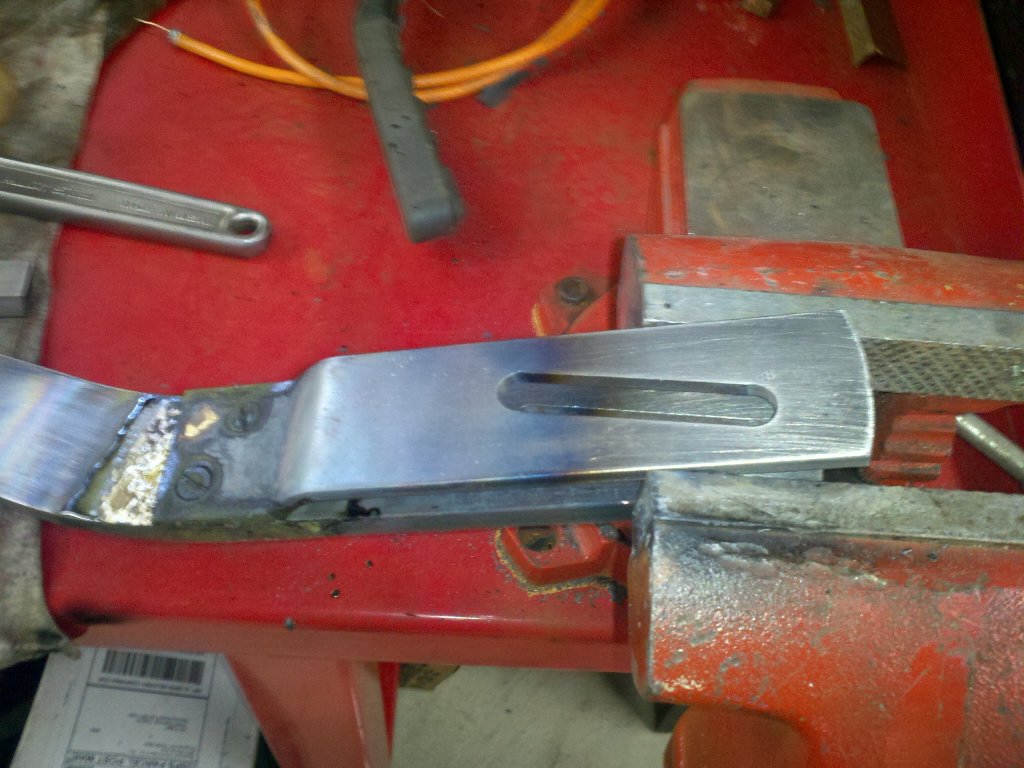
| Milling the slot on the
attachment piece |
 |
| Two pieces attached by screws |
 |
| Pieces have been silver brazed |
 |
| A little file work to clean
things up |
 |
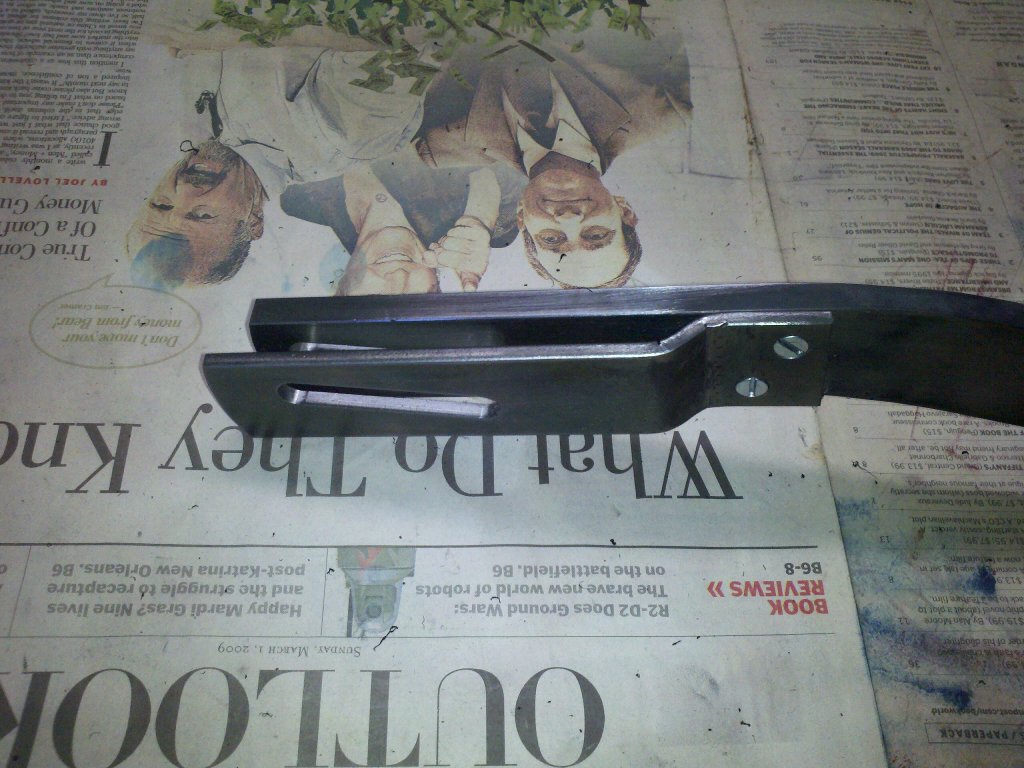
| Finished, but not painted with
the original clevis |
 |
| Back side of lift rod |
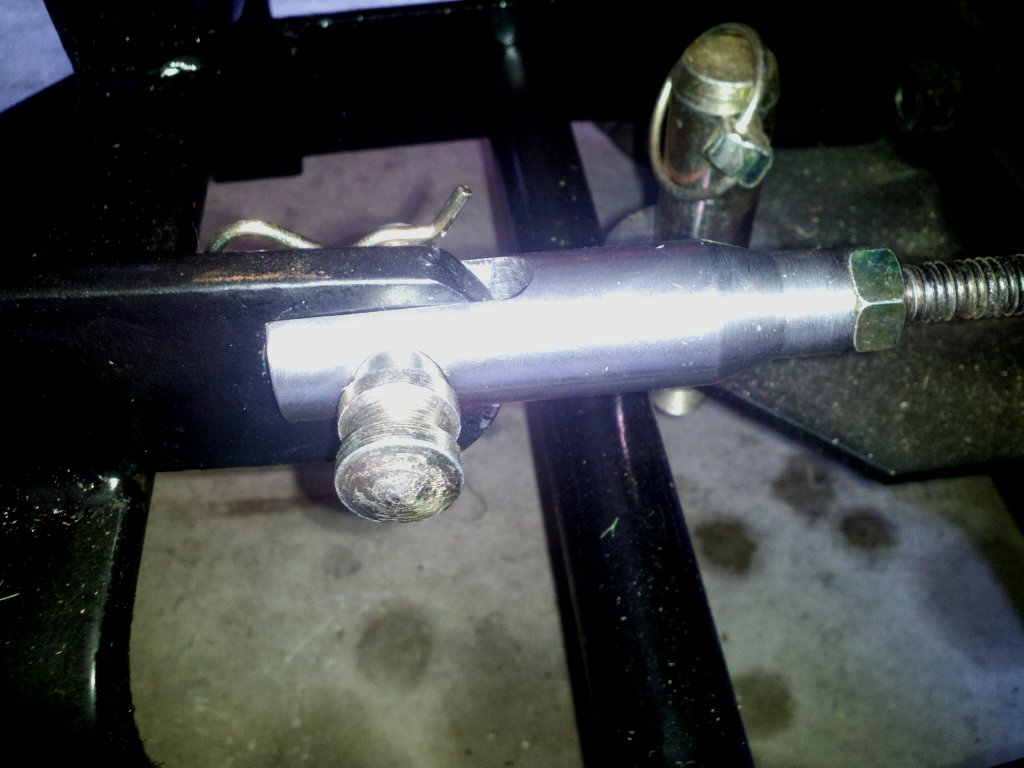 |
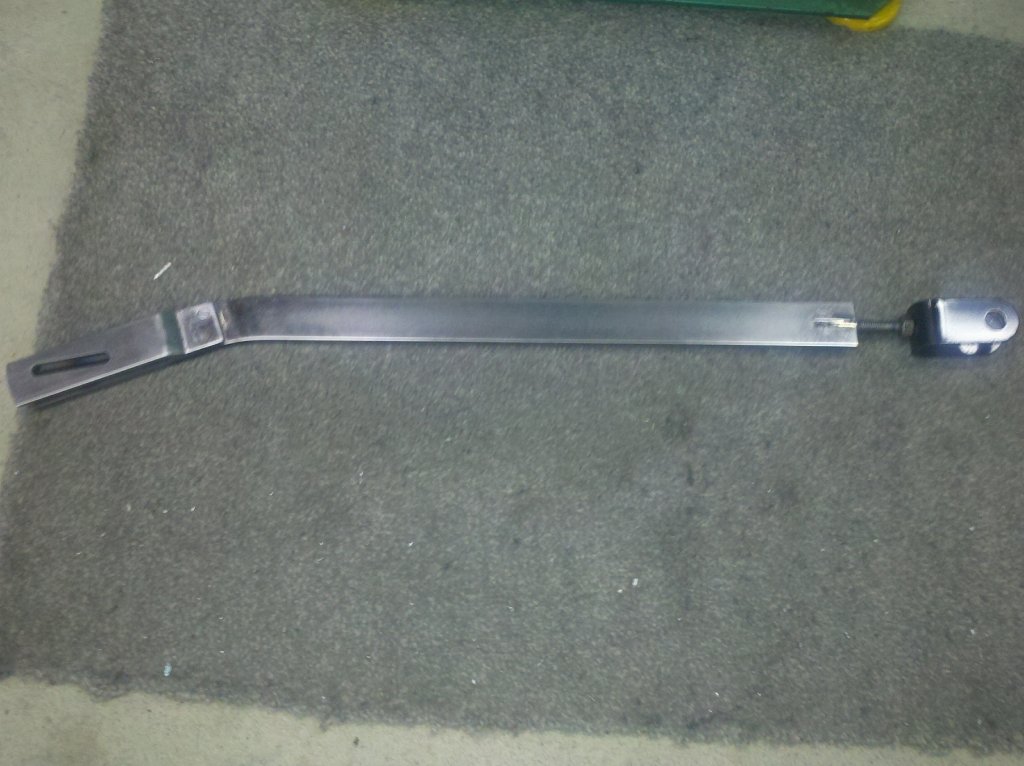
| New clevis is tried out |
 |
| Another shot of the clevis |
 |
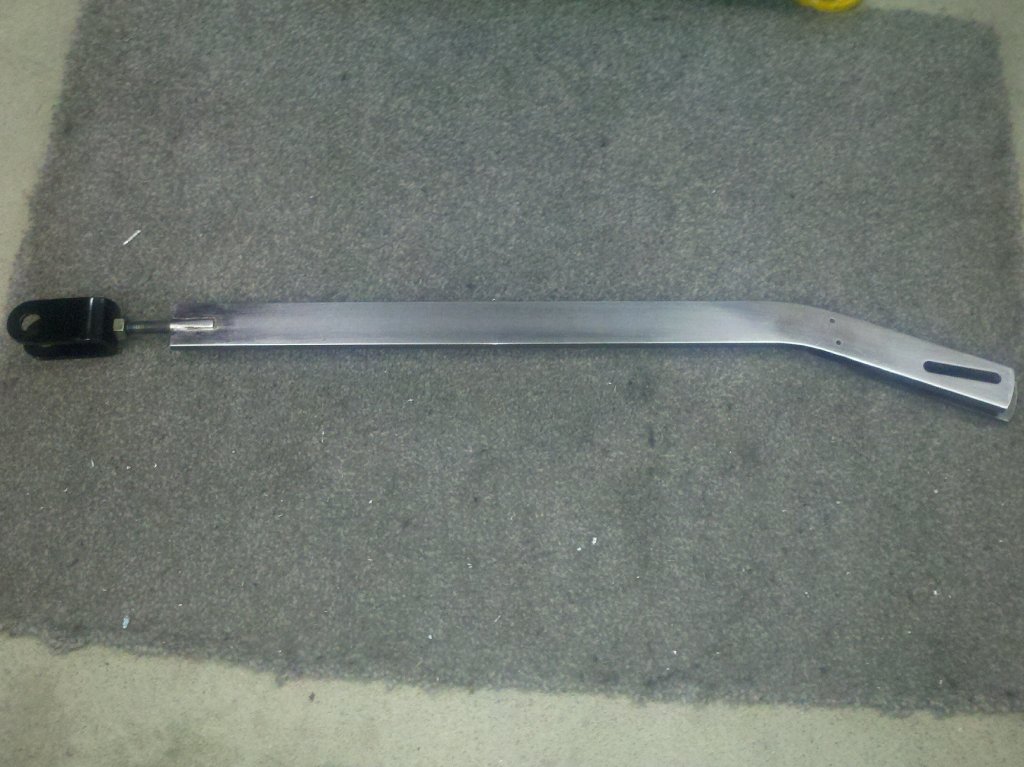
| The sleeve hitch and lift rod
are finished. |
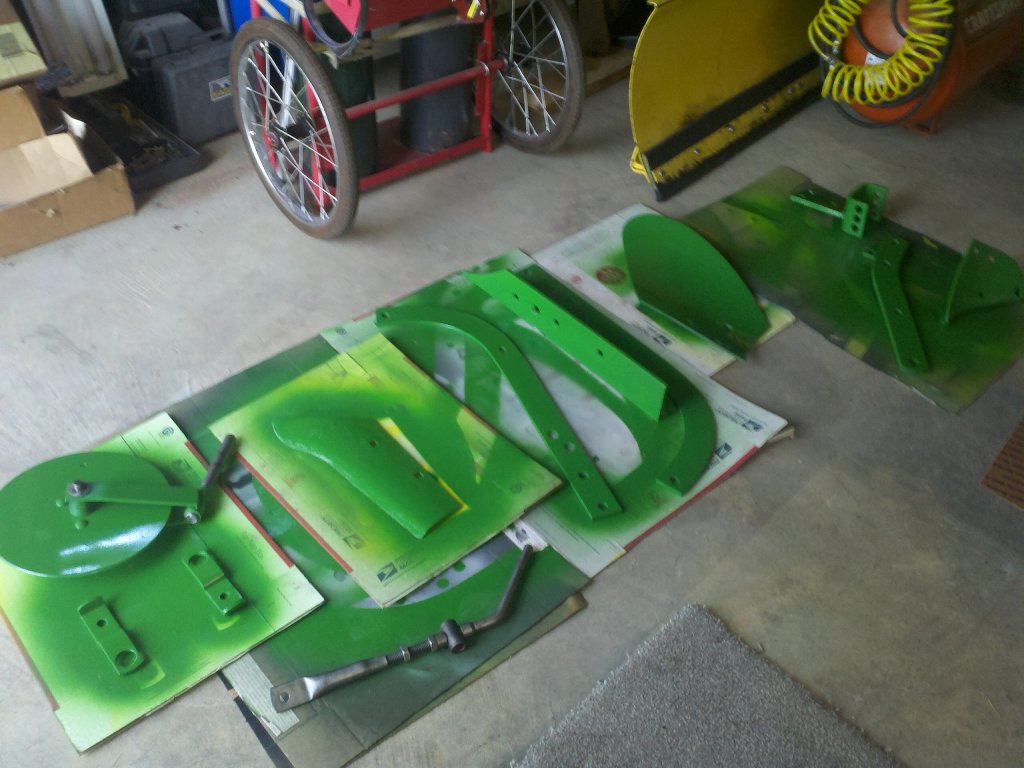 |
| Plow parts are painted and
coulter shaft has been cleaned, lubricated and assembled |
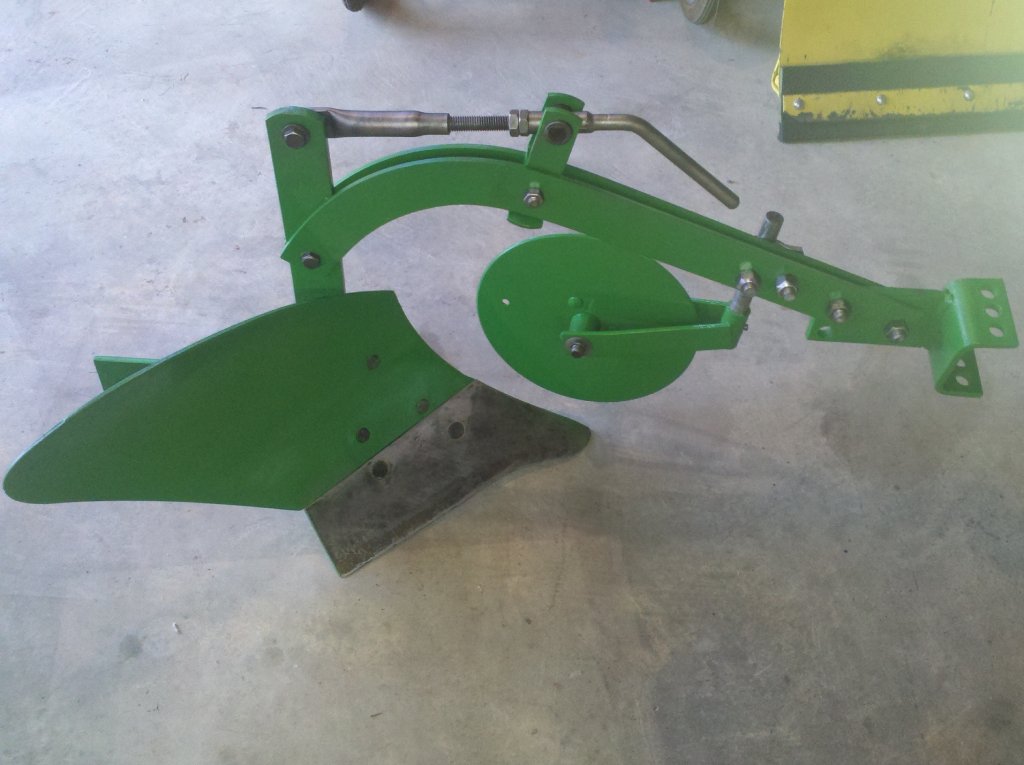 |
| Plow is assembled. The
plowshare face was left unpainted. I've read that this surface will
polish
itself in use. I also read that sometimes the paint will cause the soil
to stick to the share. I just sanded the rust off and coated it with
some oil. |
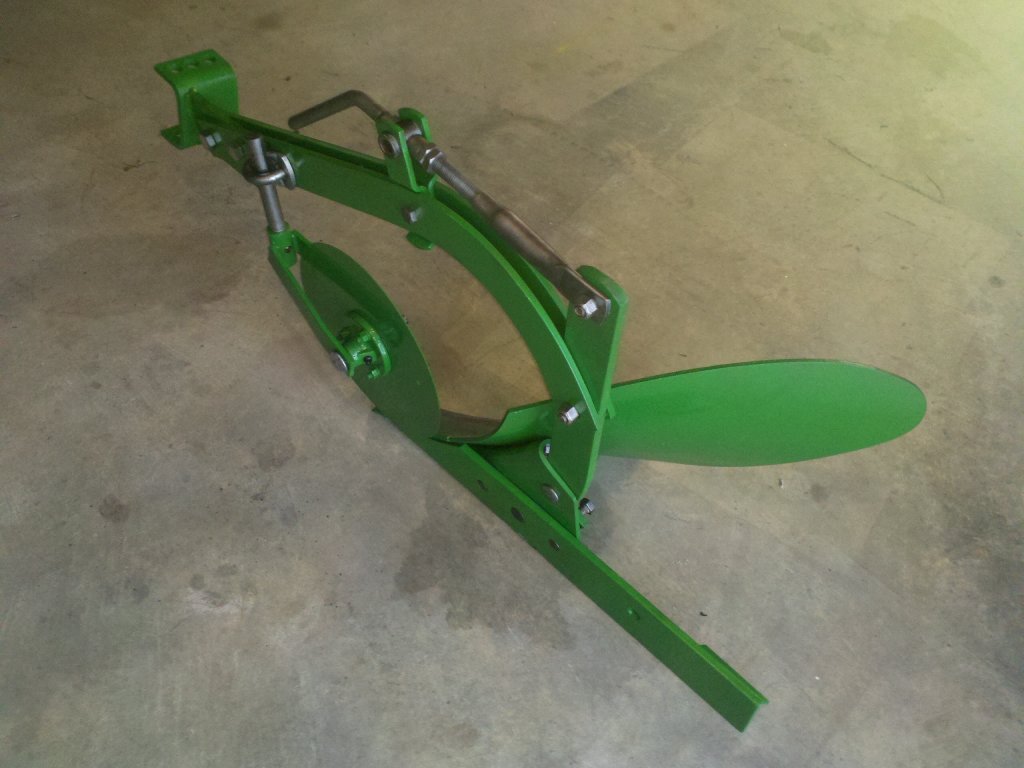 |
| Another view. It cleaned up
nicely. |
 |
| Rear view. |
© Fager 7-23-11