HOME
What's New


Workshop Stuff

Workshop

Moving the mill

Spindle Noises

ShumaTech Digital Readout

ShumaTech DRO Continued

ShumaTech
DRO-350 Repairs


South Bend 9" Lathe

South Bend 405 Lathe Bench

Grizzly Mill Revisited

Surface Grinder Rebuild

Surface Grinder Continued

Grinder April 6, 2008

Grinder April 20, 2008

Grinder August, 2008

Grinder September, 2008

Grinder November, 2008

Grizzly G3103 Mill
Rebuild

Grizzly G3103 Mill
Rebuild - Part 2

Moving the Shop

Moving the Shop 2

Bringing Home a Sheldon 12" Shaper

Sheldon 12" Shaper 2

Sheldon 12" Shaper 3

Sheldon 12" Shaper 4

Sheldon 12" Shaper 5

Sheldon 12" Shaper 6

Sheldon 12" Shaper 7

Sheldon 12" Shaper 8

Sheldon 12" Shaper 9

Way Alignment Tool


Email Jim


 workshop.gif
DoAll D624-8 Surface Grinder Continued
Updates

Week of August 31, 2008

The magnetic chuck that came with the grinder is a "Magna-Lock" brand electro-magnetic with a DoAll "Selectron" tube type rectifier. As I said before, there was a lot of coolant damage between the table pad and bottom of the chuck. I was pretty sure this damage would grind out, but wasn't so sure about resurrecting the tube type rectifier. I would have preferred a mechanical permanent magnet type chuck, but that's not what came with the grinder, so I'll keep looking for a deal on one.

I pulled the cover off of the Selectron tube rectifier/power supply. Manufactured in 1967 and looking like it had never been serviced, there was a good amount of dust and grime in there, but aside from the dirt, the tubes, wiring, and switches looked in remarkably good shape.  After removing the 4 tubes, I brushed the dust off with a paint brush, then went to work with denatured alcohol and a scrub brush. A couple hours later it looked a bit cleaner.  I scrubbed the case and chipped off the layers of old paint and put a couple of coats of enamel on the sheet metal to match the grinder.

rectifier 1
rectifier 2
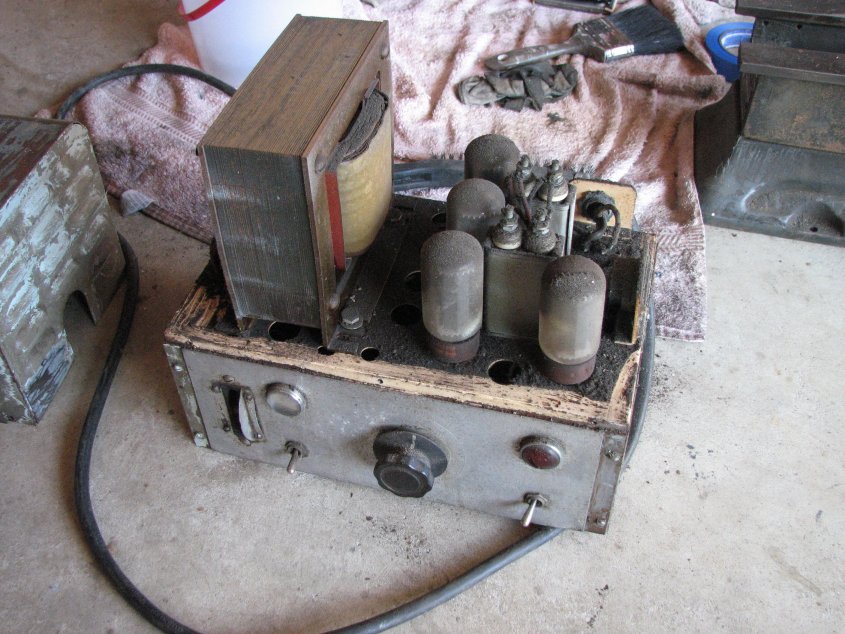
41 years of dirt, dust and crud. Time to clean.
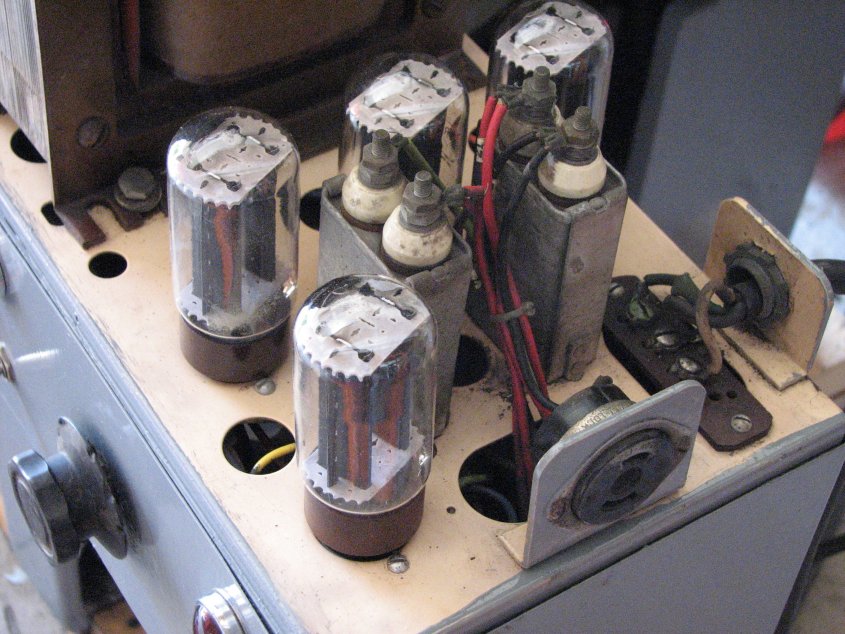
There are tubes under that grime.
rectifier 3
rectifier 4
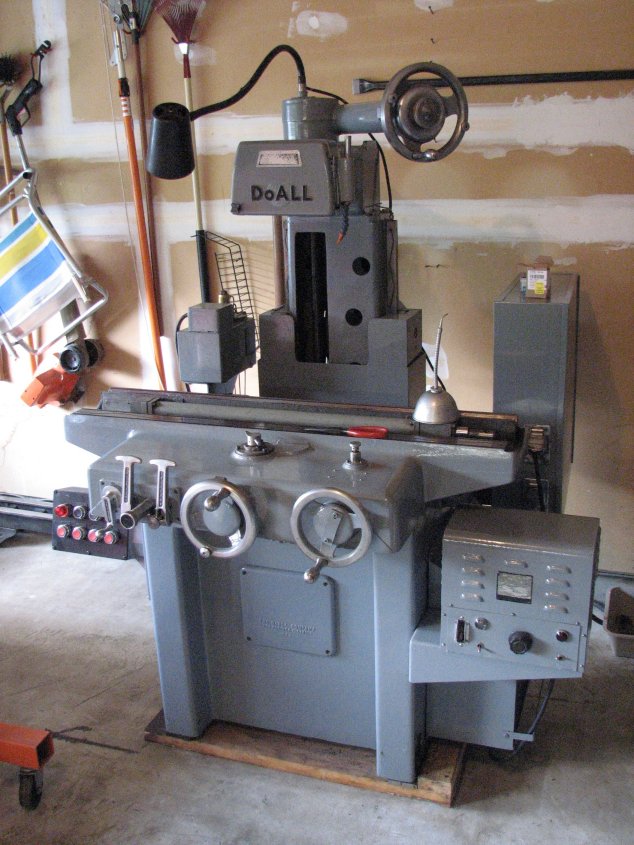
That looks a bit better.
Painted and installed on the grinder.


The tubes were handled carefully and were also washed in denatured alcohol. Wearing gloves is a good idea so that you don't leave finger prints on the tubes. The oil in the prints can cause uneven heating of the glass when the tube is fired up and can cause damage to the tube.

I let everything dry (and dry out) for a couple days before I reassembled the Selectron.  I also did some research on the web for some hints on running tube electronics that had been unused for a while. I found out that a variac would be a nice tool to have so that 
the voltage could be gradually increased.  This is supposed to allow the tubes to warm gently, as opposed to just giving them a straight shot (and shock) of 220 volts.  Unfortunately, I had no variac.  What I ended up doing was to start the rectifier at the lowest setting and let it run for about a ten minutes before gradually increasing the power to the chuck.  Whether I was lucky or my procedure helped, I don't know, but the chuck works well.  It can be set to barely hold or hold with enough power that I can't budge a magnetic type vee block. The pulse demagnetize function works quickly.

Once the Selectron was finished and I had built my rotary phase converter, the next step was to grind the table and chuck. This was the step I had been waiting for.  It would be the first concrete proof of how well I scraped this machine.  I started by setting up a dial indicator on the wheel head and traversing the table pad to find the highest spot. Then found the lowest. There was only about 0.004" difference, but that didn't take into account that there was deep pitting on many parts of the table's chuck mounting pad. I was going to need to take a bit more than 4 thousandths off. I selected a new Norton 8" 46 H wheel, dressed it and got to grinding.  Over the course of a couple evenings, I brought it down about 6 thousandths. There were still some pits on the table, but these wouldn't interfere with the mounting of the chuck. I was noticing that the wheel was leaving a pattern on the table that I couldn't get out, no matter what I tried. I knew there as a bit of wear on the spindle taper, but when I measured it, I was in for a rude awakening. 0.0012". I dismounted my best adapter, a Sopko 200, and mounted it empty. The same 0.0012" run-out. Crap. I wondered how I missed this. I re-measured the spindle taper and found that the center of the taper (where there's no contact) was dead on. Unfortunately, the two areas of the taper where the wheel adapter fits were not concentric.  Double crap.

Truing and balancing, then dressing and re-balancing the grinding wheel got me a little better surface finish, but I knew that I needed to regrind the taper. I figured that I might as well replace the bearings, as from what I could tell, they were original to the machine and I'd probably ruin them by removing them anyway.  The information tag on the grinder listed the spindle as a BD3-4 and much later when I removed and rebuilt the spindle, I found that, indeed, it was a BD3-4 that had never been opened.

Throughout the long process of working on the ways, I had been waiting for the day that I'd be finished and able to check and confirm my scraping job.  The best way to do that was to grind in the table and check it with a surface plate and straight edge, so I continued to grind. All told, I ended up taking about 0.007" off the table before I had a surface that I thought was good enough to work with.  There were still some pits, but they were small and not clustered in any one spot.

I had been doing a lot of reading about grinding tables and how to check the ways for flatness. There are a lot of remarks that dispel the myth that grinding 4 small pieces placed in the corners and one piece in the center of the table will allow you to check the grinder's ability to grind flat.

The fact is that you can check the ways regardless of table condition with a surface plate shimmed to be level. With the surface plate shimmed so that an indicator attached to the wheel head reads the same height in all 4 corners, you traverse the plate with the indicator by using the feeds. If the ways are bowed or not a constant height,  the indicator will show it. I had done this check many times as I measured and scraped the ways. I actually got pretty quick in removing and replacing the saddle and table. I now wanted to place the surface plate face-down on a freshly ground table pad and check for contact. If I had done as good of a job scraping as I thought I had, I should get good contact.  After I finished grinding the table, I set the blued surface plate on top the table pad, the carefully removed it.  When I saw the even transfer of blue on the freshly ground table, I got one of those smiles that you get when hours and hours of work have finally paid off. Pretty neat.

Even though I knew I'd be regrinding the table and removing another couple of tenths from the table when I reground the spindle taper, I went ahead and finished the job by grinding both sides of the chuck. After working on this grinder for almost 11 months, I wanted to play with it a bit before I tore into the spindle.

grind_chuck
grind_chuck 2
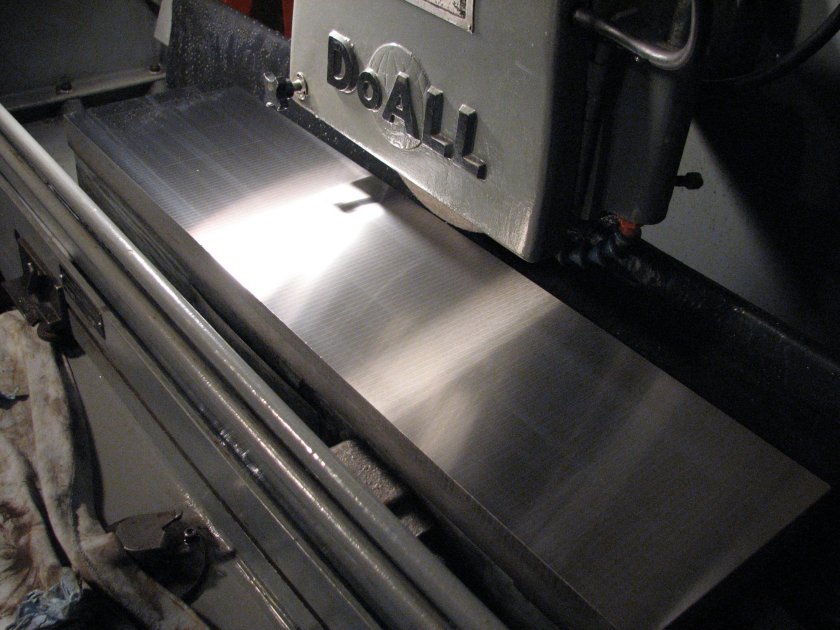
Pretty nice finish if I'd wiped it better.
Another shot of the chuck
grind parallels
DoAll Grinder
Parallels are ground true
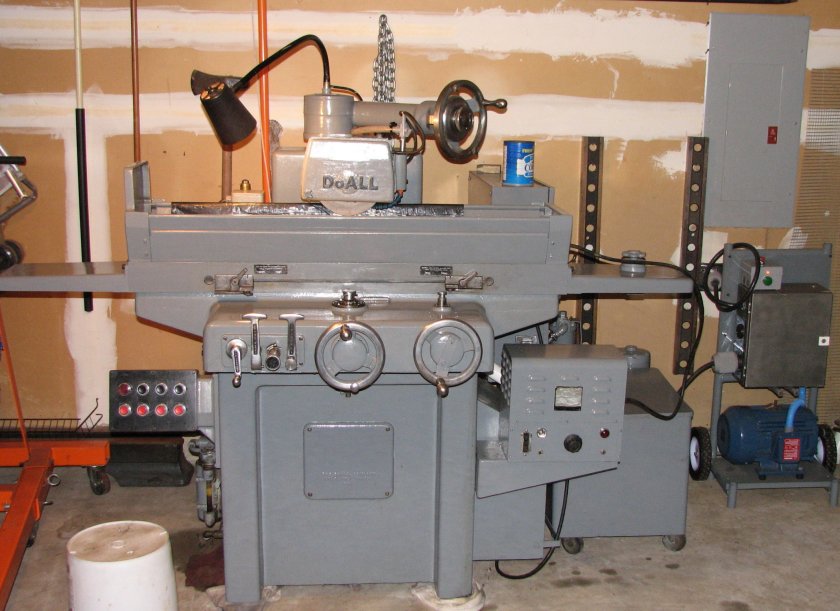
The DoAll D-624-8 surface grinder


The grind of the chuck came out better than I could have hoped for. There was a very faint pattern due to the spindle, but it is a cosmetic malady. I cannot measure the depth of the pattern with any tool I own. This includes the Mahr Supramess. So with the table and chuck ground and all of the guards assembled, I was finally able to play with the grinder. I'm sure it will take the remainder of my days to become somewhat proficient in grinding, but I began the journey by trying to grind some stock flat and parallel.

It will take some time to get familiar with how much power to use on the magnetic chuck, but in the course of an afternoon, I was able to grind the top and bottom surfaces of a 12" X 3" X 0.5" CR steel flat to parallel within a tenth over the 12". The tenth that I ended up with was due to using too much power on the chuck on the first pass. The raw stock wasn't flat and having too much power pulled the center down. Once it was ground and removed from the chuck, it sprang back. This left the ends low and the center high. I found that shims under the ends helped me grind out the bow I had introduced, but finding shims within a couple ten-thousandths of each other and setting them properly under the stock is not as easy as it might seem.

Thicker stock was much easier to grind flat and parallel. I reground a pair of worn 1-2-3 blocks back to usable condition, though they are now a bit smaller than their original size, they are parallel and square to about a half a tenth by my measurements.  UPDATE 11/2008: After finishing the spindle, I ground a pair of older import parallels. The surfaces are so close in height and parallelism that with the parallels resting on my surface plate, the needle on my 0.0005" resolution Brown and Sharpe indicator barely wavers in any direction or between the two pieces.  For grins, I measured the remainder of the parallel set and found that the less used sizes, which were in almost unused condition varied by a tenth or more over their 6" length.  Comparing the finish of the parallels I ground and the others in the import set, the finish I am able to produce so far on this grinder is at least as good. 

Grinder 1
Grinder 2 Grinder 3 Grinder 4 Grinder 5 Grinder 6 Grinder 7