
|

So far, so good.
At about this point you may be thinking
that this is too easy. You're right. The hardware is the easy
part. Calibration is a little tougher, but certainly not difficult.
You'll need
Celsius reading thermometer with a probe
(or convert °F to °C).
Some plastic wrap or the finger from a
latex glove and a twist-tie.
A cup of water.
The calibration software - steinhart.zip
- (and Excel to run it on).
gp_Temp
software.
First we need to setup the Windows gameport drivers.
**************************
Windows 95/98 Driver Setup
**************************
1. Click "Start" | "Settings" | "Control Panel"
2. Double click "Gaming Options" (Joystick Icon)
3. Click "Add"
4. Choose "2-axis, 2-button joystick" | Click "OK"
5. Click the "Controller IDs" tab
6. Make sure that the "Port Driver" box reads "Standard Gameport"
7. Make sure that the "Poll with interrupts
enabled" check box is checked | Click "OK"
*************
gp_Temp Setup
*************
I have gone through the calibration process quite a few times and have found that using water as the medium to get the readings is much easier and more accurate than trying to measure changing air temperatures. Water holds its temperature longer and transmits its heat better.
After unzipping the "gp_Temp1_0.zip" file, double click "setup.exe" and follow instructions to install.
Open gp_Temp. If the Windows driver and/or thermistors are not installed correctly, you will receive error messages.
NOTE: When the program opens for the first time, don't worry that the temperature readings are off (way off for most cases). The only thing we need at this point is for the "port status" to read "port status: sensors connected." If it doesn't, recheck your thermistor hookup and joystick driver installation. Also, the numbers in the setup coefficients are there only as place holders. They will be replaced during the calibration process.
1. With gp_Temp open, click "File" | "Setup." At the top are the "Raw Data" boxes. These are the readings from the thermistors through the gameport. The allowable port values are "0" to "65535."
2. Below "Raw Data," click on the dropdown
box arrow and select Sensor 1-1 for Sensor 1 and Sensor 2-1 for Sensor
2.
 |
3. Click "Save to Registry," then "Refresh Settings." This creates the necessary registry keys for the rest of the process.
4. In the test boxes at the bottom, you may now rename all of the sensors (if you wish). When finished, click "Save to Registry" and "Refresh" again. This will rename the items in the dropdown box and set the current sensor name above the main temperature boxes.
5. Select "Celsius" for both sensors. Click "Save" | "Refresh."
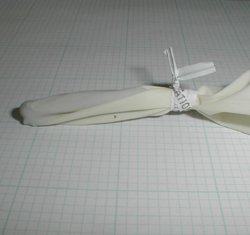
6. Bundle your 2 thermistors together with
the probe from a Celsius reading thermometer. Seal them in plastic
wrap if you are going to use the water method. You will need a total
of three readings at least 10°C apart (15° is preferable) to compute
the "Setup Coefficients."
 |
 |
7. Place the wrapped thermistors in a glass
of water. Let the readings from "Raw Data" stabilize as much as possible
and note both the temperature in degrees C (it MUST be Celsius or converted
to Celsius) and the raw data readings for that temperature. If the
Raw Data readings fluctuate, note the high and low reading for the temperature.
When it comes time to input these readings into the Steinhart - Hart equation,
you can try the high, low and median to see which give the best results.
Write down the results for later use.
Something like
Sensor1: 25°C = 3296 (Readings
from my 10 k thermistor)
Sensor2: 25°C = 17283 (Readings from
my 50 k thermistor)
 |
8. Raise or lower the temperature at least
10°C and take the readings again. I have found that working with
hot tap water and letting it cool slowly gives the best results.
If you need to get the water cold for calibrating a 10 k thermistor, there's
always ice. You can get a few degrees below freezing by making a
brine of salt and a little water and filling the cup with ice cubes.
Write down your results.
Again, something like
Sensor1: 10°C = 5203
Sensor2: 10°C = 31036
9. One more time. Raise or lower the temperature
at least 10°C and take the readings again.
Once again, something like
Sensor1: 0°C = 7903
Sensor2: 0°C = 53133
It doesn't matter what temperatures you read the Raw Data at, as long as they are at least 10°C apart (20°C between the highest and lowest temps). However, I have found that the thermistors are most accurate at the following ranges:
10 k: -15°C ± 25°C
(5°F ± 45°F)
50 k: 10°C ± 25°C
(50°F ± 45°F)
100 k: 35°C ± 30°C
(95°F ± 50°F)
If you are using a 10 k with a 50 k or 100 k thermistor, it is probably best to calibrate the 10 k thermistor separately. On my system, the absolute temps I can read with any accuracy are
10 k ohm thermistors: -40.5°C to 25°C
(-41°F to 77°F)
50 k ohm thermistors -3.5°C
to 65.5°C (26°F to 150°F)
100 k ohm thermistors 7.7° to
77°C (46°F 171°F)
************************************
Setting the Temperature Coefficients
************************************
1. Download steinhart.zip.
It's a small 15 kb file that will plot the temperature setup coefficients
using the Steinhart-Hart equation.
2. Unzip steinhart.zip and double click on the ST&HT_EQ.xls file to open it in Excel.
3. Starting with the lowest temperature and Raw Data reading for Sensor 1, enter the temperature into cell B14 and the Raw Data into cell C14.
4. Enter the mid-range temp and data into B15 and C15.
5. Enter the high temp and data to B16 and C16.
6. Click on any blank cell to compute the coefficients.
NOTE: If any of the coefficients
(B24, B25, and B26) have a negative value (-0.003 or whatever) your temperature/data
readings are incorrect and cannot be correctly computed. Negative
values WILL NOT work in gp_Temp. Try taking the Raw Data /
temperature readings again and using a wider range (15°C, rather than
10°). If you had fluctuations in the Raw Data readings, try your
high, low and median readings. Once you get proper results from the
Excel sheet, you can determine which of the three readings is causing the problem
and retest that temperature.
 |
 |
7. Reopen gp_Temp to the setup screen and make sure that the correct sensor is chosen under Sensor 1.
8. Switch back and forth between Excel and gp_Temp to copy and paste the coefficient for "a" in cell B24 into the text box labeled A1 under Sensor 1 "Setup Coefficients" in the gp_Temp setup screen.
9. Copy the coefficient for "b" (cell B25 on the Excel sheet) to Sensor 1 - B1.
10. Repeat for "c" (cell B26 on the Excel sheet) to Sensor 1 - C1.
11. Click "Save to Registry" and "Refresh Settings."
12. Repeat steps 3 through 11 for the Sensor 2 temperature readings and Raw Data.
13. Close Excel. Do not save changes to the worksheet, if prompted.
14. If all is correct, you should have a working gameport thermometer.
Conclusion
First, I offer no warranty on this software.
Hell, I can't even guarantee that it will work on your system. This
is the first program I have released outside of a small circle of friends
and while I have tested it on as many machines as I could find and have
fixed what I think are all of the bugs, chances are pretty good that I
have missed something. If it wipes your drives, turns your monitor
monochrome, or makes a pass at your neighbor's cat, I'm not responsible;
however, if you find a problem or bug, please let me know and I'll do my
best to rectify it.
The next step for the program is to add two more channels (most gameports will work with two joysticks, so I'll have two more axes to read from). My main reason for the gameport thermometer was to give me a way to log temps from a new heat sink tester I want to build. Once I get the 4 channel thermometer up and running, it's on to building the tester. If you're interested in what approach I plan to take with a tester, it will follow the same general design as the one built by Tillmann for his testing on his Anandtech articles. His article on the ideas behind the tester, as well as some good pictures of the unit can be found here http://www.anandtech.com/showdoc.html?i=1429. Well worth the read.
I have also been looking at some circuits
that will allow me to read *many* sensors from the serial port. The
serial port allows for better accuracy and the opportunity to control external
devices. However, the serial port thermometer is somewhere in the
future. As usual, I have more ideas than time.
|
page 1 |
page 2 |
page 3 |
page 1 |
page 1 |
page 2 |
page 3 |