
|
I Rest my Case?
The time had come. The InWin A500
case had grown too small and too hard to work with. Having to remove
the entire cover to gain access, and having to pull the motherboard tray
to get at the processor and heat stink was becoming a bother. The
final straw was that the Alpha P125 heat sink was going to be too tall
for the tight confines of the A500. What to do?

The finished product (for now).
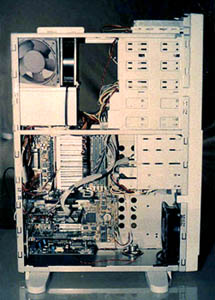
Easy Access
Access to the inside of the case is provided
by 2 removeable side covers after the top cap is slid back. The case
is made with enough precision that it fits together tightly without requiring
the retaining screws to be in place. This is a real plus if you are
constantly opening the case. Most of the sheet metal edges of the
case are rolled. This greatly reduces the risk of cutting yourself while
working inside it. Definately a plus if you spend a lot of time
tinkering.
Moving Air
Ventillation on my case was limited to
just the power supply fan. This, of course, meant that some more
cooling was in order. After the learning experiences I went through
with the A500, I had a good idea of where to start. The first thing
I did (after checking to make sure that the power supply worked) was to
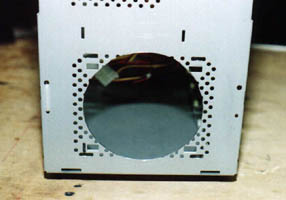
cut the intake hole for my 4" (105mm) 110 volt front fan. I mounted the
fan using a gasket made of an old mouse pad to keep noise and vibration
to a minimum.
 |
 |
Another Fan
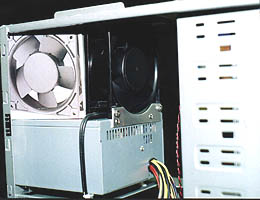
For the exhaust fan, another 4" 110 volt
unit was used. The placement of this fan is still under consideration.
I have not yet determined that it's present home is producing the
best possible air flow. For the time being a I have assembled a duct
out of the box the fan came packaged in. A little recycling never
hurts. The reason behind the duct is to take full advantage of the
many vent holes punched in the rear of the case. For the fan to operate
at its full potential, the surface area of the exhaust holes
should at least equal the amount of surface area of the fan blade opening.
The fan should also be placed far enough from these holes that it can utilize
them without causing back pressure due to the air rebounding.
Front Cover
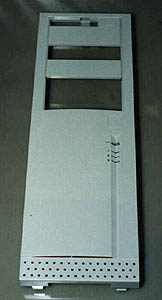
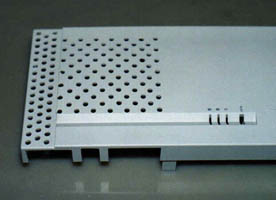
The front cover modifications started
the same way I started with the A500. I cut a mock-up from some cardboard
and tested a few configurations before I took the drill and Dremel tool
to the plastic. Unlike the A500, I got better flow in the case with
some air holes cut directly in front of the fan blades. Like the
A500, openings cut along the side of the cover did a lot to increase flow.
The end result is not too bad to look at and the openings have enough surface
area that I should be able to rig some type of filter without slowing down
the airflow too much.
 .
. .
.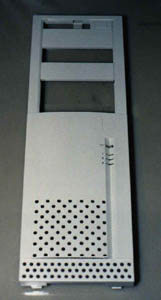
The front cover gets its share of holes and cut outs.
Splitting Cables
One of the big plusses of a full tower
case is all of the room. To fill that room with wide IDE and SCSI
cables strewn about would hinder the air flow. I had heard of people
splitting their IDE drive cables between the ribs with a razor knife
and stacking the cut ribbons together to shrink its profile. With
a couple extra cables handy in case I made a mess of things, I split and
stacked the cables into neat little bundles. I also routed all of
the wiring to stay as far from the air flow as possible. So far,
no problems with the split cables - SCSI or IDE.
The split cables take up less space.
Performance
At this point, the case is a little too
new to get a real good feel for how it will perform under all conditions,
but with a room temperature in the 78°F range with the peltier active
and Quake2 timedemos going, the maximum air temperature in the center of
the case was 82°F. This is not quite as good as the results I
got after cutting a hole in the top of the A500 and mounting a 4" fan to
blow straight up, but it's not too bad either. I think with a little
more work, I'll be able to get the case temp down a bit more without resorting
to more fans. The end result has lots of room and is pretty cool. At $91 from
the folks at American PC
(close to home to avoid shipping) it was money well spent.