
|

There are some good articles on waterproofing on the web with some different takes on the ways you can go about it. Most people use some type of commercially available conformal coating. However, there's always someone who goes about things in a unique way. The "Vaseline solution" at the Hack Shack is one such unique way.
After reading the ingredients of the different conformal coatings, I found that a number of them were polyurethane based compounds. Having just done a refinish of our hardwood floors a while back, I happened to have some poly made by a company called Deft. I coated an old circuit board with it and not surprisingly it worked great. The board belonged to a digital multimeter with a bad ammeter shunt and it worked as well as I could have asked for while submerged in water up to the display.
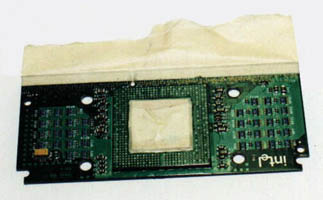
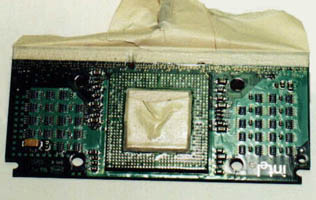
Tape it and Coat it
I started by taping off the edge connector
and slug. I then coated the front side by applying the poly with
a foam brush. For the pedestal with its exposed pins, I worked on
one side at a time, forcing the poly under the pedestal and letting it
flow. After drying for a few hours, I could apply the next coat and
fill the space a little higher. After the fourth coat, I had completely
sealed the space.
I coated the entire SEPP a few more times to ensure that I had not missed any spots where moisture could enter. This process took a couple of days to complete, but I figured that the time was worth not having to worry about short circuits.
 |
 |
Insulating the Celeron
Well, I'd done my homework and read everything
I could get my hands on about condensation and how various manufacturers
and others had dealt with it. I'd played with the "foam in a can"
and made a mess all over the workshop without achieving a great deal of
success. I'd stuck a thermocouple all over the various parts of my
heat sink, backing plate, and insulation and measured temperatures.
One thing I saw caused me to re-think some previous notions I had about
backing plates and trying to cool the back side of a Celeron.
I stated some time ago that cooling the back side of the Celeron was an exercise in futility. My reasoning was that the fiberboard was an insulator and doesn't transmit heat well. While I still believe that this is not the most effective way to cool your Celeron, I was surprised to find that the Aavid heat sink I used as a backing plate was getting cold enough to build up condensation when used with a peltier. The TEC was actually drawing heat through the slug, wafer inside, fiber circuit board, duct tape (to protect the back of the Cele), and dropping the temperature of the Aavid. Not just dropping it a bit, but by more than 20°F below room temp!
With this in mind, I started designing my new insulation. Undoubtedly this design will be refined through trial and error, but these were my considerations:
Get rid of the Aavid and insulate the
back of the Cele.
Design the backing plate to fit the
Abit SEPP holders on the board to hold the Cele steady.
Try to make the Celeron as air tight
as possible - seal all seams on the insulation.
Insulate the screws that hold the sandwich
together so the heat sink can't transmit heat to the cold plate.
Try to find an insulation that is superior
to egg cartons and meat trays.
I succeeded on all but the last item. I know that there's better insulation available, I just haven't come across it yet. Here's a cut-away view of how the parts stack together.
Here are the parts that make up insulation - from the backing plate to the top of the Celeron.
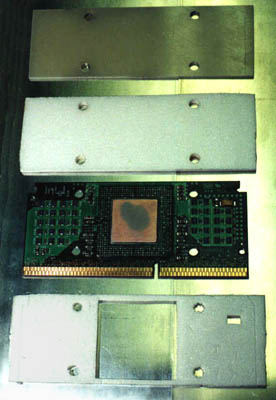
From the top; fiberglass, insulation, Cele, insulation.
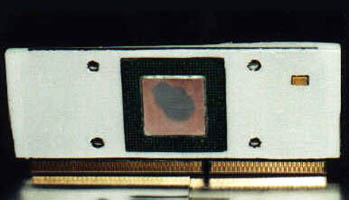
And a couple of shots of the pieces being assembled. The pieces are held tight to each other with waterproof, double-sided tape. Well, it's not really tape, more like the adhesive from tape. Some stuff I had left over from my days with VW. It's used to hold the waterproof door panel liners on. (It's expensive and silicone sealant would probably work as well, but here is the part number if you're interested ... AKL 434 019 25.)
 .
.
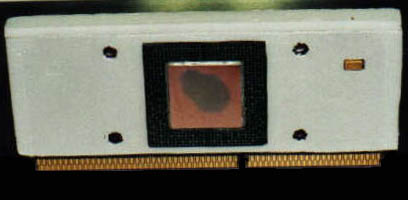
The rest of the insulation stacks on top of this unit. It is a bit of a trick to get the right thickness of insulation between each stage so that the plates make good contact while keeping the outside air from penetrating through to the cold pieces. Once you get the proper thickness for each piece, it goes together quickly.
Performance
Adding this insulation dropped the internal
diode temp by about 12°F at idle and about 8° when gaming.
The best part of it all is that with this new insulation attached to the
watercooler/TEC heat sink and running some sub zero temps at idle and in
the low 40's when being pushed, I have yet to see even a hint of condensation.
This is with room temperatures in the mid-eighties, and with the kind of
humidity that soaks you when you step outside. Of course, no sooner
did I finish this project when I read ( at Melcor,
I think.) that if one type of foam is good, two types are better.
One close to the chilled item to insulate it and another outer layer to
act as a vapor barrier. Maybe I'll start on that next week.